
The plans leave it a little ambiguous as to not specify how many plies of this UNI tape to use - it just says to fill enough of the trough to make it flush with the rest of the airfoil contour. It does however state that each ply is about 4 to 6 inches shorter on each end.
I worked out some quick math: the thickness of the trough at the centerline of the canard is roughly 0.18". The 3" UNI tape lays up about 0.026" thick... so this means the center should require about 7 plies.
The bottom skin is the same as the original plans - 1 ply UNI full-span, 1 ply BID at 45 full-span, and another ply of UNI full-span. The 1 ply of BID is cut from three sections (see page 10-4 in the plans); however, one of these sections gets cut in half so that each half gets used on the ends (see page 10-7 in the plans).
Currently, the canard measures 130" in length, so the UNI plies had to be cut 140" long (I gave myself 5" overhang on both ends). With my canard on the bench, I needed room to cut all this glass. So I laid clean construction paper on my driveway to protect the cloth and cut it there.

I then divided the 38" wide cloth into three equal widths... so that each UNI ply would be 12.66" wide.

Using my hook blade, I ran it across the entire 140" length... I didn't even have to draw a line across the cloth since the UNI thread was guiding the blade for me!

Running the blade across the entire length literally took less than a minute! I then rolled them up. The bottom layup only requires two 140" x 12" plies, but since I had everything ready to cut, I went ahead and cut three more plies that will later be used for the top layup.

The BID ply requires three sections cut at 45 degree... 13" wide (see plans page 10-4). Again, since I knew I was going to need another 3 sections for the top ply, I went ahead and cut them at this time.

That's a a lot of glass! Notice the 3" UNI tape wheels in the back! Again, this is for the bottom AND top layups.... and I was left with a spare 140" x 12.66" ply.

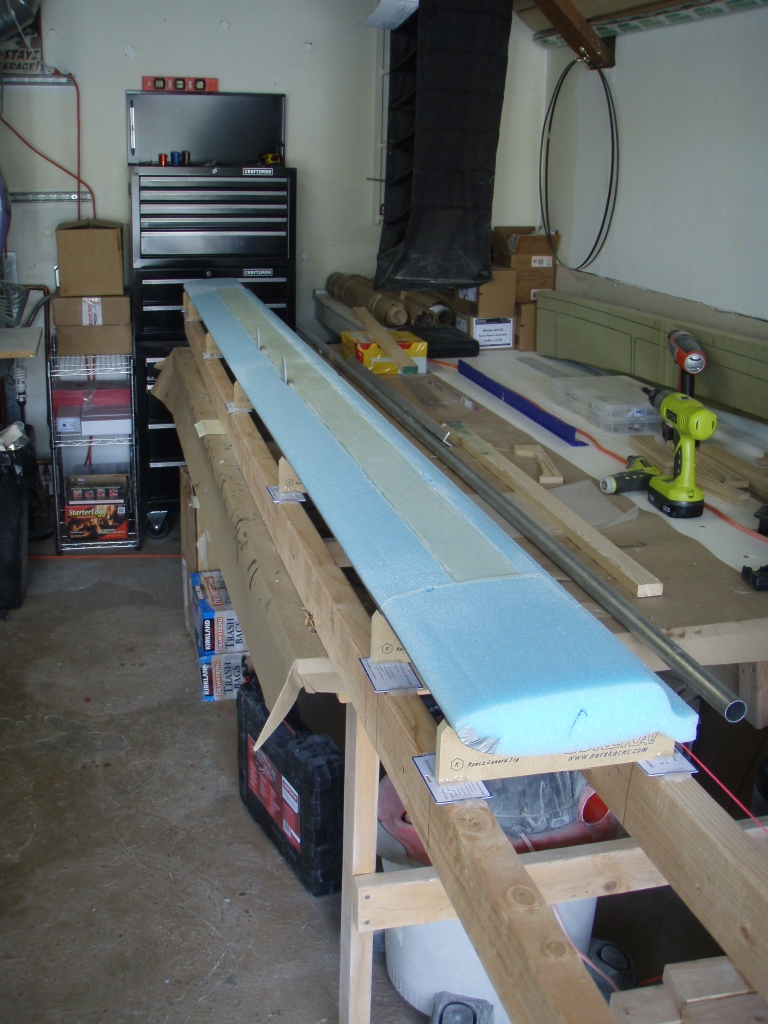
At this point, my canard was still 'floating' on the jigs... I hadn't yet bonded it to the jigs. This allowed me to sand the end extensions 100% flush around the leading edge..

Also, I had some shear web cleaning up work to do. This was the micro runoff from when I bonded the leading edge to the shear web.

After a little bit of light sanding, the shear web was free and clear of any micro.


With the leading edge prepped, it was now time to bond the canard to the jigs. I placed the canard onto the jigs...
And made sure the trailing edges were 100% flush...

Looking gooooood!

I then weighed the canard down onto the jigs...

And made sure the surfaces were making contact with the jigs (i.e., no light shining through)...

Happy with the fitting onto the jigs, I used my hot glue gun to bond the canard onto the jigs. I used small blobs on the duct tape so that it would not damage the foam on the fwd lip...

On the aft lip, I put glue blobs on the fish tail portion of the foam. The fish tail later gets chopped off, so I did not care if this part gets damaged by the glue when I remove the canard from the jigs later.

With the canard bonded to the jigs, I checked for twist again... here is the left tip... showing -0.6...

And the right tip.. showing the same angle... meaning no twist... wooohoooo!!! Center was the same. Remember that the -0.6 degree magnitude is irreverent... as long as it the same throughout!

I then sanded the shear web one last time to make sure the surface was prepped for bonding...

Covered the lift tabs with tape to protect them from the epoxy to come...

Another shot showing the leading edge duct tape... straight as an arrow!

Added wax paper on the ends to protect the foam while doing the cap layups...

Used clear tape to protect the rest of the foam... clear tape is cheaper than duct tape!

Before getting started, Elle helped me trim the BID selvage edges that get butted during the 2nd ply of the skin. Better to cut these now while our hands were clean with no epoxy.

That is one big wheel of 3" UNI tape!! Heavy too!

I started by adding a very small amount of micro along the perimeter of the cap. This is to help transition the shear web / foam / UNI cap edges. I was very nervous here, I did not want to get ANY micro on the shear web!

I then painted plain epoxy onto the shear web...

In goes UNI tape ply #1, full-span. Chronologically, I had already built my center section spar which uses this very same UNI tape. If you are interested in reading up on how to use this UNI tape, I highly recommend reading the center section spar top spar cap blog post.

After wetting out the first ply, I measured 4" to 6" inboard and made tick marks on the clear tape to help me know where to cut the next ply. Elle is pulling out the red thread which locks the roving cross threads...

After the red thread is removed, Elle holds the UNI tape down with a squeegee card as I pull the roving cross threads out in a single pull...

After all roving cross threads are removed, I began to wet the UNI tape... using the paint brush and squeegee cards. A little bit of use of the heat gun or hair dryer really helped wet the thick UNI tape fibers.

Here is a good shot showing a "step" of a shorter UNI tape ply... notice how I cut them at an angle to help transition it smoothly...

My math ended up being correct... it took me 7 plies to level the bottom spar cap at the centerline of the canard - and shortening the UNI tape lengths 4" to 6" per side worked out perfect.

Perfectly flush with the rest of the airfoil...

It took about 4 hours to do the cap layup (including setting up, masking the foam area off, etc).
The plans say something along the lines of, "If you are tired, it's ok to peel ply the cap and continue with the skin after cure." But then it goes on to say, "but continuing on to do the skin will result in a stronger bond since it cures as one piece." I don't see how this is an option?! I wasn't going to stop now even though I was tired! I had to quit crying and carry on!
We took a quick 5 minute break and we prepped everything for the bottom skin layup.
I started out by removing the masked covered areas. We then slurried the foam surfaces with a brush - being extremely careful not to get any micro on the cap! I then used the baker's icing trick to apply a small bead of micro all around the cap to help transition the skin ply from cap to foam.

I then applied a 1" wide peel ply strip along the trailing edge. This will help prep the bottom skin surface to bond with the top skin trailing edge surface later on. I used staples every foot or so to hold it in place.

I then added some dry micro around the lift tabs..

Ok, this puppy is now ready for the bottom skin!

Even though the cap was still tacky, I painted fresh epoxy onto the spar cap.

Things moved pretty fast here so I did not get a shot of rolling out the first UNI ply. It was pretty simple. I centered it and rolled it out like laying out a red carpet. We used a paint brush to apply the epoxy and a squeegee card to smooth everything out... including the micro to have a nice transition. The plans say 1/4" of micro onto the cap is acceptable.

You can see where I had filled the dowel holes with dry micro on the aft end...

Ply #2 was the BID ply at 45. Here is where I did a small error. Page 10-7 in the plans shows how to use the four sections that make up this BID ply. The first two sections overlap in the middle of the canard, creating a small triangle where there is no overlap. My error was that I overlapped them such that this triangle was on the leading edge... where as the plans (on page 10-7) shows this triangle to be on the trailing edge of the canard. I noticed this error after I had already wetted it out. I made an engineering decision to move forward, as this has no structural effect on the canard.

I then cut the third BID section in half, giving me the left and right pieces for the end tips. The edges were butted, not overlapped - like the plans specify.

Here is a good shot showing how the brush made it easy to apply epoxy to the leading edge...

The third and final ply was just like the first UNI ply. I centered the roll...

And as I unrolled it, Elle would make sure it was straight and even - with proper overhang on the leading and trailing edges. When we got to the lift tabs, we used a blade to make a small slice and pass the lift tabs through - this was pretty easy to do (sorry, no pic of that!).

After wetting everything out, we trimmed the overhangs...

And added 2" peel ply to the leading edge. This will prep the bottom skin to receive the top skin overlap.

Checking for air bubbles... and making sure everything was kosher...


The next day, I removed the peel ply from the leading edge...

Trimmed up the ends...

For the leading edge, I drew a line where I could see the edge of the duct tape...

I then trimmed along the line.. full span...

The duct tape did a great job at making sure the overhang did not stick to the leading edge...

Perfect!

I then trimmed up the trailing edge...

The canard bottom spar cap and skin are complete!! That was a 7+ hour layup... and that was with Elle's help! I can't imagine doing this one solo!

No comments:
Post a Comment