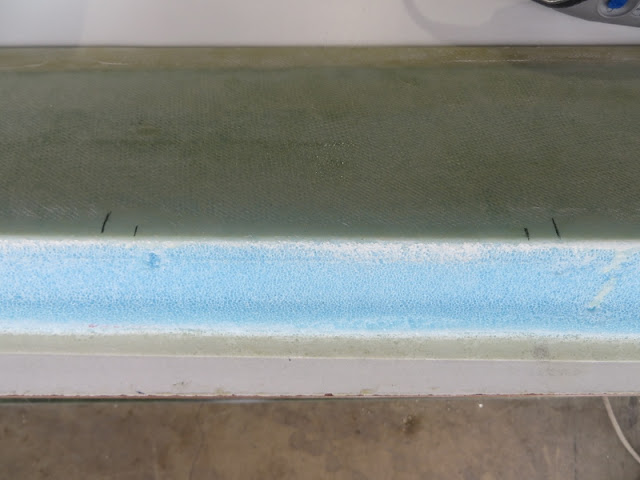
With the wing pockets finished, it was time to complete the ailerons. This is how they were as soon as I cut them off the wings.
First step was to clean up the epoxy that had run down while the wing layups were done. Using the dremel, I carefully removed all epoxy stains...
Next step was to remove some foam off the aileron's leading edge to make room for the aileron counter-balance weights... this is simply a 3/8" dia steel rod. So I marked 3/8" from the leading edge..
I then removed the foam...
And sanded it with the dremel to remove all the micro and prep the surface for a good bond...
I then cut the steel rods to length with an angle grinder...
Next up was to prep the ailerons' leading edge to accept the A2 and A5 brackets... I marked the location of the hinges on the ailerons... and then marked where the brackets will go. Since the brackets are 1" wider than the hinges (to give us a little wiggle room), I marked the edges of the brackets...
I then used a blade to make a slot for the bracket to fit up against the top of the aileron...
The plans don't mention anything about removing micro from the glass, but I felt it was the right thing to do... so I took a dremel cut wheel...
And on very slow speed, used it as a sanding disk.... this worked great! And surprisingly enough, didn't break any wheels!
Here's the A4 bracket...
Perfect fit!
Not so fast! The brackets have to be perfectly flush with the foam... so I marked the brackets' borders...
And used the dremel to mill out 30 thou off the foam so the bracket could sit flush!
Next up was milling out the pocket for the A10 inboard tube... this is the tube that connects the aileron torque tube to the aileron. Notice that the A10 pocket is 1" shorter than the A3 bracket recess.. that's because the A10 tube sticks out (inboard) by 1"....
With everything prepped, it was time to bond the A11 steel rod (counter-balance) to the leading edge lip. I cleaned up the rods and test fitted them in place...
Painted plain epoxy on the 3/8" glass lip...
And painted plain epoxy on all the rods...
I then mixed up dry micro in a ziplock bag, and applied it to the foam/glass corner lip....
I then pressed the rods in place and let them cure. The next day, I used the dremel to sand the leading edge flush with the rod. This is a very important step and is mentioned in CP#26 under 'builder hints'.
Sanding a little bit more for a perfectly rounded aileron leading edge...
Oh yea! Looking great!
It was now time for the layup... I should note that I regret having done both left and right ailerons at the same time. I underestimated the amount of time it takes to paint plain epoxy, slurry the foam, apply dry micro where needed, paint plain epoxy on the A10, A2 and A5 parts, micro them in, etc! Everything worked out great, but if I were re-doing this, I would tackle one aileron at a time.
Since I was fighting the clock to get both aileron leading edges completed, I didn't take too many pics... but after painting plain epoxy to the glass where the 1 ply BID @ 45 overlapped, we painted slurry to the foam, mixed up dry micro for any voids... then painted plain epoxy to all metal parts... then put micro where the A10 tube went and brackets.. installed those, and then installed the 1 ply BID.
Peel plied the overhang for a nice transition to the aileron...
The next day, I removed the peel ply and cleaned everything up....
Aileron leading edges complete!
Before glassing the end ribs, I made sure the edges were trimmed up square.... so I clamped the aileron into place...
And double-checked all edges... I had to sand the ailerons a small bit to straighten up the ends...
With the aileron ends squared... I marked 0.4" at the aileron ends (per plans page 19-14 section K-K and L-L)..
Used a dremel to mill out the foam 0.4" deep...
Notched out a "V" on scrap foam blocks to hold the ailerons up...
I also sanded the micro away for a nice glass-to-glass bond... and taped the A10 tube to protect it...
I painted plain epoxy on the glass lips... and slurried the foam...
I then applied 2 plies BID to form the end ribs and let them cure...
The next day, I trimmed the ribs and sanded everything flush...
With the ribs complete, we are now ready to install the ailerons to the wings!


No comments:
Post a Comment